Enhanced Visual Inspection: Stereo Microscopy for Surface and Structural Analysis
Surface defects like micro-cracks (10–200 µm) or coating delamination directly impact product reliability in aerospace and consumer electronics industries. While tools like SEM provide nanoscale resolution, they lack the speed and depth perception needed for macroscopic quality control.
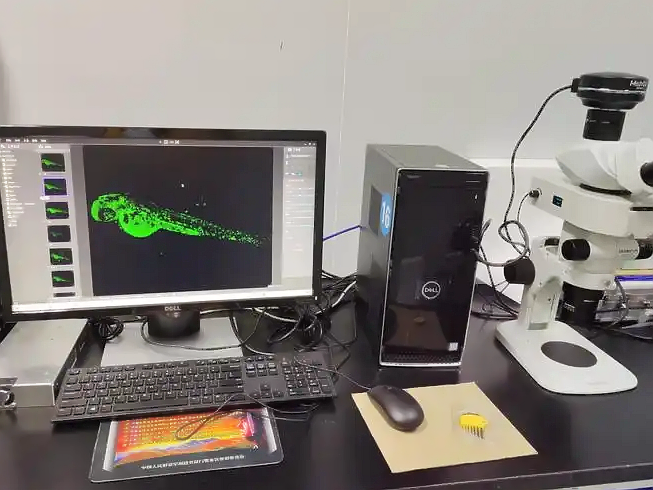
Neway’s Leica M205-C stereo microscopes address this gap with 20.5:1 zoom and 3.5 µm resolution, enabling real-time 3D inspection of aluminum die castings, zinc alloy connectors, and post-processed surfaces. This technology is indispensable for high-throughput production lines requiring sub-minute defect analysis.
Stereo Microscopy: Principles and Technical Advantages
Optical Design
Stereo microscopes utilize twin optical paths (Greenough or CMO systems) to generate 3D images with depth perception. Key specifications of our M205-C systems:
Magnification: 7.8x–160x (20.5:1 zoom ratio)
Resolution: 3.5 µm at 160x
Depth of Field: 2.3 mm at 7.8x, 0.02 mm at 160x
LED Ring Light: Adjustable coaxial/epi-illumination for powder-coated or anodized surfaces.
Key Applications
Surface Defect Detection:
Identify micro-porosity (50–200 µm) in A380 Aluminum engine brackets post-die casting.
Detect coating delamination (>100 µm) on Zamak 5 electrical connectors.
Dimensional Verification:
Measure flash (excess material) thickness (0.1–0.5 mm) on CNC-machined brass fittings.
Validate thread pitch (0.5–3.0 mm) in CuZn10 plumbing components.
Assembly Quality Control:
Inspect solder joint integrity in medical device assemblies.
Stereo vs. Compound Microscopy: Performance Comparison
Parameter | Stereo Microscopy | Compound Microscopy |
|---|---|---|
Magnification Range | 7.8x–160x | 40x–1000x |
Working Distance | 110 mm | 0.5–4 mm |
Depth of Field | 0.02–2.3 mm | <0.01 mm |
Sample Preparation | None (non-destructive) | Sectioning/polishing required |
Ideal Use Case | Surface defects, assemblies | Microstructure analysis |
For example, inspecting anodized layers on aerospace fasteners requires 50x magnification to detect color inconsistencies (>5% ΔE), achievable in seconds with stereo microscopy versus hours for SEM.
Integration with Neway’s Quality Workflow
Stage 1: Incoming Material Inspection
Zinc Alloys: Detect oxide inclusions (>200 µm) in Zamak 3 ingots using 30x magnification.
Aluminum Alloys: Verify grain structure in A413 billets for die casting compliance with ASTM B85.
Stage 2: Post-Processing Validation
Powder Coating: Identify pinholes (100–500 µm) on HVAC components under polarized light.
Tumbling: Assess edge radiusing (R0.2–R1.0 mm) on tumbled zinc parts.
Stage 3: Root Cause Analysis
Case Study (2024): A client reported intermittent conductivity in Brass 360 valves. Stereo microscopy revealed incomplete threading (missing 1–2 turns), traced to tool wear in CNC machining. Implementing a real-time tool monitoring reduced defects by 89%.
Cost-Benefit Analysis
Inspection Speed: 10–15 seconds per part vs. 2–5 minutes for digital microscopy.
Scrap Reduction: Early detection of casting flashes reduced rework costs by $12,000/month for a low-volume automotive client.
Training Efficiency: Intuitive operation cuts inspector training time by 70% compared to SEM.
Conclusion
Neway’s stereo microscopy solutions bridge the gap between visual inspection and high-magnification analysis, offering rapid, cost-effective defect detection for die-cast, machined, and coated components. Combined with our engineering services, we ensure your products meet AS9100, ISO 13485, and IATF 16949 standards.
FAQs
What is the maximum sample size your stereo microscopes can accommodate?
Can stereo microscopy detect subsurface defects in aluminum alloys?
How does stereo microscopy handle reflective surfaces like anodized aluminum?
What industries benefit most from stereo microscopic inspection?
Is stereo microscopy suitable for automated production lines?

