Zinc Die Casting Design Guidelines for Thin Walls, Threads, Ribs, and Complex Shapes
Good zinc die casting design starts with a clear die opening direction and a controllable metal path, then gives each wall, rib, boss, hole, thread and detail enough room to fill, cool and release. There is no universal minimum wall, rib ratio or draft angle. Part size, flow length, alloy, gate and vent access, die depth, texture, load, finish and inspection state determine the workable geometry. Use numerical rules only after the die caster reviews the actual CAD and validation plan.
Begin with die architecture, not isolated feature rules
A feature is castable only if the die can create it, the metal can reach it, displaced air can leave, and the part can be ejected without damage. Establish the primary opening direction before polishing wall thickness or adding detail. Place the parting line with flash, gate trimming, visible surfaces and measurement datums in mind. Mark every undercut that needs a slide, lifter, loose insert, collapsible mechanism or later machining within the proposed zinc die casting route.
This first layout often changes the product design. Rotating a slot into the pull direction can remove a side action. Moving a cosmetic edge away from the parting line can simplify flash control. Opening a blind pocket can improve venting and permit a stable core. The tool and die concept should show these consequences before the OEM releases production geometry.
Define which surfaces stay on the moving half and which remain on the fixed half during opening. Zinc contracts onto cores as it cools, so the retention pattern affects where ejectors can push. A deep internal shell with insufficient draft may grip the core while a thin visible wall receives the ejector load. The result can be drag, whitening, dents or distortion even when cavity fill looked good.
Design wall thickness as a flow system
The useful wall question is not "How thin can zinc flow?" It is "Can this section fill through the proposed path with an acceptable process window?" A short wall close to a gate is different from the same nominal wall after metal has crossed ribs, turns and a long cosmetic face. Alloy fluidity, gate velocity, die temperature, venting, surface area and local detail all affect the answer.
Keep structural walls reasonably consistent, but do not apply uniformity as a blind command. Loads, sealing lands, threads and external interfaces may need different sections. Transition between them gradually, core heavy volumes and use shape for stiffness. The goal is a thermal and flow pattern the die can repeat, not identical thickness at every coordinate.
Geometry decision | Production risk | Design response | Evidence before release |
|---|---|---|---|
Long, thin last-to-fill wall | Cold shut, incomplete edge, oxide front or unstable cosmetic surface | Shorten flow, revise gate/overflow path, remove unnecessary turns or locally revise section | Flow review, trial window and inspection at the far edge |
Heavy boss on a light wall | Hot spot, pore concentration, surface read-through and distortion | Core the boss, connect load with ribs and blend the transition | Sectioning or targeted internal check plus dimensions after cooling |
Broad unsupported panel | Flex during ejection, cooling or assembly | Add curvature, beads or load-oriented ribs; improve ejector support | Flatness in agreed restraint and assembly load test |
Thin cosmetic edge | Fill hesitation, gate witness sensitivity or damage in trim | Orient flow along the edge, add radius and define trim support | Approved appearance sample across process window |
A claimed minimum wall without flow length, feature area and tool concept is not transferable to a new part. Use the published discussion of minimum zinc wall thickness as a question list, then obtain a project-specific recommendation. Prototype geometry can check fit and handling, but a non-production prototype process does not prove the HPDC fill window.
Transition thickness with radii and coring
Abrupt thick-to-thin steps disturb both stress flow and solidification. The heavy region remains hot while the light wall contracts and stiffens, which can pull the part or concentrate internal discontinuities. Blend the transition and core material that does not carry useful load. Rounded internal corners also reduce local stress and help metal follow the cavity without separating at a sharp turn.
Do not specify a large fillet everywhere. A radius consumes space, changes mating clearance and can create a thicker diagonal section at a three-way intersection. Review the actual section through rib roots, boss connections and corners. The useful radius is the one that reduces notch and flow risk without creating a new hot mass or interfering with assembly.
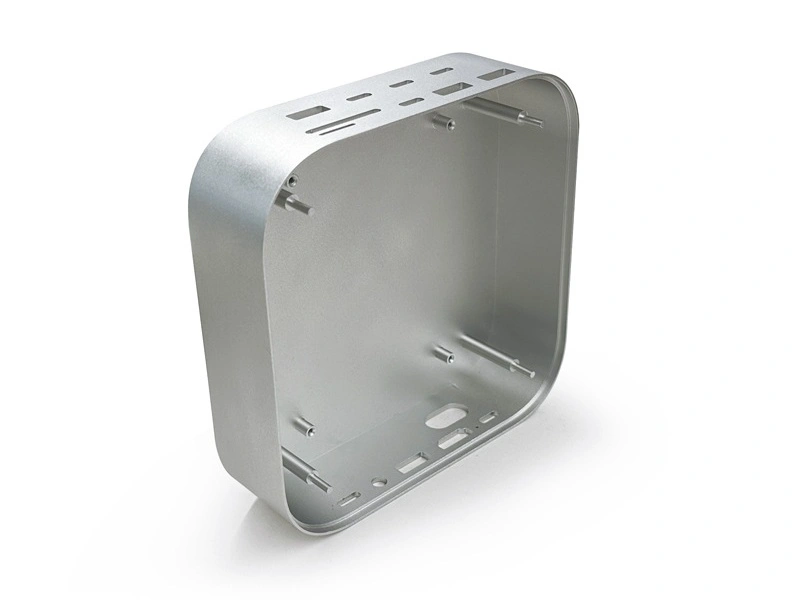
Use ribs to create a load path, not decorative mass
A rib increases bending stiffness by moving material away from the neutral axis and by connecting features that would otherwise move independently. Its direction matters. A rib that does not intercept the dominant load may add heat and ejection resistance with little functional benefit. Start from where force enters, where the part is constrained and where movement is unacceptable.
Keep a rib compatible with the adjoining wall and casting flow. A thick root can print through a visible face or collect shrinkage. A tall thin rib may freeze before filling, trap air at its end or bend during ejection. Draft both sides, blend the root, terminate it without a sharp notch and give trapped air a route toward a vent or overflow. Multiple ribs can distribute load, but a dense grid can block flow and make ejector placement difficult.
Verify rib stiffness and casting quality separately
Analysis can compare rib layouts for deflection and local stress, but it does not prove that the cavity will fill or that the casting is free of a cold shut at the rib root. Correlate structural analysis with an assembly load test. Confirm fill through trial inspection, and check visible surfaces opposite heavy junctions for read-through after the intended finish.
Connect bosses to the surrounding structure
A boss carries concentrated fastener, pin or locating load. A free-standing heavy cylinder on a thin floor is usually a poor load path and a poor thermal design. Core the center where possible, connect the boss with ribs or gussets, and spread force into walls that can react it. Check the ligament between the hole and boss outside diameter, the boss-to-wall junction and the distance to an edge.
Fastener behavior depends on more than boss thickness. Specify the fastener, thread engagement, installation torque, preload, number of service cycles and whether the screw is self-forming, tapped into zinc or installed into an insert. Test cracking, stripping, pull-out and residual alignment on production-intent castings. A material tensile value alone cannot release a boss.
Bosses also affect ejection. A deep cored boss contracts onto its pin, and a cluster of bosses can lock the part unevenly. Add draft to cored surfaces, polish where appropriate, cool the region and place ejectors so forces do not bend the surrounding floor. The preferred solution balances retention, pin stiffness and load performance.
Choose a thread manufacturing route
Zinc die casting can form some thread shapes, but "cast thread" covers several very different tool mechanisms. An external thread split at the parting line may release with the two die halves if flash at the seam is acceptable. A thread aligned with a slide may be formed by side action. A complete internal thread generally needs an unscrewing or collapsible mechanism, a removable insert, or a cast pilot hole followed by tapping. Each route has different tooling, cycle, maintenance and inspection consequences.
Thread requirement | Likely route | Reason to reject that route | Release check |
|---|---|---|---|
Coarse external form along a feasible split | Cast in die halves or slide | Parting witness, flash or taper interferes with mating | Functional gauge and mating trial after trim |
Light-duty internal fastening | Cast pilot then tap, or evaluate a special core | Chip control, positional drift or tool access is unacceptable | Torque, stripping and cleanliness test |
Repeated service or sealing thread | Machine from controlled datum; consider insert if justified | Wall ligament or porosity exposure cannot support function | Gauge, leak or pressure test and assembly cycling |
Decorative cap thread | Cast, chase or hybrid route | Feel, finish buildup or seam visibility misses product requirement | Finished-part torque and appearance sample |
Use post machining when it gives a simpler die and a clearer acceptance method. Include thread datum, coating state, burr direction, chips, cleanliness and gauge method in the route. Machining is not automatically more accurate if fixture location and casting stock are unstable.
Design holes, slots, text and texture for the die
A cast hole needs a core pin stiff enough to resist thermal and filling loads. Long slender pins can deflect or break; blind pins trap air at their ends; closely spaced holes leave weak die steel between features. Through-holes along the pull direction are often simpler than deep blind holes, but part function decides whether that route is acceptable. A pilot depression can locate later drilling without forcing the die to create the final bore.
Raised and recessed text should have draft, edge radii and enough separation for toolmaking, polishing and coating. Very sharp valleys are difficult to vent and easy to damage. Texture adds friction during release and changes appearance after plating or paint. Put fine cosmetic detail on a die surface that can be manufactured, vented, polished and maintained without dismantling an unnecessarily complex insert stack.
When feature position drives assembly, define the datum relationship and inspection state. A core-created hole can move with die temperature or pin deflection, while a machined hole can move with fixture location. Ask whether the tolerance applies before or after coating and whether the part is measured free or assembled. The overview of zinc die casting tolerances does not replace a feature-specific stack review.
Set draft from retention and surface condition
Draft reduces sliding interference during ejection, but the required angle is conditional. Internal surfaces tend to grip a core as zinc contracts. Greater draw depth increases sliding distance. Texture increases mechanical engagement. Polished external faces with short draw may release with less draft than a deep textured pocket, but die wear, lubricant, temperature and ejection balance still matter.
Define draft per feature and dimension from a stated end or basic plane. Taper changes the size along depth, so a drawing must identify where the functional dimension applies. If a sealing land or bearing fit cannot tolerate taper, shorten the as-cast land, move it to another direction or machine it. Do not force zero draft over a deep surface and leave production to solve the resulting drag.
Draft and ejector layout are one decision
Even sufficient draft cannot prevent distortion if ejector force acts on weak walls or the casting remains unevenly attached to the die. Place ejectors on supported, non-cosmetic regions when possible and distribute force around deep cores. Define acceptable ejector marks, witness height and any later finishing. Trial evidence should include drag marks, dimensional change before and after ejection adjustments, and surface appearance after coating.
Control undercuts and side actions
Undercuts are not forbidden; they are paid for in die architecture and risk. Slides create additional parting interfaces, wear surfaces, hydraulic or mechanical actions and timing requirements. Every shutoff can flash. Every long narrow core needs support and cooling. A slide may be justified when it removes assembly parts or machining, but an undercut added only for styling can burden the tool for the entire program.
For each undercut, compare four options: rotate or open the feature, accept a parting split, add a slide, or machine after casting. Compare tooling cost, cycle, maintenance, flash access, secondary-operation cost, volume and functional risk. The lowest unit price route may differ from the lowest tooling route. Record the selected assumption in the RFQ so suppliers quote the same geometry.
Design for gating, venting and trimming
The product drawing rarely shows gates and overflows, but product geometry must leave space for them. Reserve non-functional land where metal can enter without crossing a sealing face or highly visible area. Provide a path from gate to last-to-fill features and then to vents or overflows. Closed pockets, isolated rib ends and lettering at the end of flow deserve special review.
Gate trimming needs support and an acceptable witness. A thin edge can tear or bend. A gate on a visible face can require expensive finishing. An overflow connected to a functional feature may distort it during removal. Ask the die caster to mark gate, runner, overflow, vent, parting and ejector assumptions on a review model before design freeze.
Integrate finish and assembly before tooling release
Finish changes design. Polishing can round text and expose pores. Plating and coating add thickness at holes, threads, shutoffs and mating faces. Blasting changes texture and can soften sharp detail. Masking needs access and may leave an edge. Specify appearance zones, allowable die witnesses, gate vestiges, ejector marks, coating state and final dimensions before committing the die.
Assembly loads reveal whether ribs, bosses and clips work together. Include mating CAD, fastener details, insertion direction, tool clearance and expected service operations. An integrated clip that saves one screw may require a thin cantilever that is vulnerable during ejection or repeated use. Verify insertion force, retention, creep and misuse on finished components.
Use a feature-to-evidence validation matrix
Feature | Design question | Production evidence | Buyer acceptance |
|---|---|---|---|
Thin wall or fine edge | Can it fill over the planned flow path? | Trials across an agreed process window and inspection at last fill | Complete fill, appearance and functional stiffness |
Rib and boss network | Does it transfer load without hot spots? | Targeted internal check and dimensional study | Deflection, torque, pull-out or alignment test |
Thread or bore | Which operation creates final form and datum? | Process route, gauges, tool-life control and cleanliness | Mating, torque, leakage or cycle test |
Deep or textured face | Can it release without damage? | Draft/ejector trial and surface limit samples | Dimensions and appearance after finish |
Undercut or slide feature | Is tool complexity justified? | Slide concept, shutoff control and maintenance plan | Flash, position and total-cost approval |
RFQ inputs and project boundaries
Send native CAD, a controlled drawing and mating-part geometry. Mark material/standard, annual demand, visible surfaces, loads, service temperature, corrosion exposure, finish, threads, datums, sealing regions, machined zones and dimensions that affect fit. State whether suppliers may propose geometry changes and how those changes will be approved.
Primary pull direction and permitted parting, gate, ejector and slide witness areas.
Wall and feature priorities, including last-to-fill cosmetic or pressure-sensitive zones.
Fasteners, torques, repeated assembly, inserts, clips and mating clearances.
As-cast, machined and finished-state dimensions with measurement restraint and timing.
First-article, dimensional, internal-integrity, functional, finish and assembly evidence.
Tool ownership, cavity assumptions, expected maintenance boundary and engineering-change control.
The die caster can propose DFM, gating, tooling and process controls, but the OEM remains responsible for product loads, safety, regulatory obligations and acceptance criteria. Simulation can compare concepts; it does not replace physical trials. A prototype made by another process can confirm ergonomics or assembly, but it cannot establish zinc HPDC fill, porosity, ejection or production finish.
Use a controlled engineering review to record each exception from the preferred geometry, why it remains, what die action or secondary operation it requires, and how it will be validated. That turns "complex shape" from a sales phrase into a set of owned manufacturing decisions.
The final design rule
A suitable zinc die cast part is not simply thin or intricate. Its sections form a fillable flow network; its heavy features are cored and connected through useful load paths; its holes and threads have an explicit manufacturing route; its surfaces carry enough draft for their depth and texture; and its undercuts justify their die actions. Finish, inspection and assembly are part of that geometry.
Freeze numerical wall, draft and tolerance values only after reviewing the actual alloy, die layout, flow distance, cavity depth, finish and acceptance method. Then prove the difficult features on production-intent trials. This approach protects both design intent and tooling investment without pretending that one generic dimension can release every zinc die casting.
Frequently Asked Questions
What wall thickness is recommended for zinc die casting parts?
Can zinc die casting produce threaded holes and fine detailed features?
How do ribs and bosses improve zinc die casting part strength?
What draft angles are recommended for zinc die cast components?
Which part geometries are most suitable for zinc die casting?